Skip to content
Twinnoverse
  • About Us
  • Careeres
  • Legal
  • Contact Us
  • English
    • English
    • Français
    • العربية
Twinnoverse
Search
  • About
  • Contact
  • digital twin Blog page
  • Documentation
  • Home – twinnoverse – digital twin

Getting Started

  • Protected: Welcome to Twinnoverse!
  • Quick Start: Your First 3D Real-Time Scene in 5 Minutes

Asset Management

  • Protected: generate a 3D asset from image
  • Uploading and Preparing 3D Models
  • Using the Asset Editor
  • Supported 3D Formats & Best Practices

Datasource Management

  • Datasource Types Explained
  • Setting Up an API Ingest Datasource
  • Understanding API Keys & Security

Widget System

  • Creating Alerts
  • Adding Widgets to a 3D Asset
  • Widget Library Reference
    • LineChart Widget
    • BarChart Widget
    • DoubleData Widget
    • Single Data Widget

The Scene Engine

  • How to navigate the 3D scene
  • Scene Editor vs. Scene Viewer
  • Building a Scene in the Editor

Developer & API

  • Ingest API Reference

Usecase & Examples

  • Data Connectors
    • from Excel TO 3D visualization
  • Usecases
    • pharmacetical manifactre shop floor
View Categories
  • Home
  • Docs
  • Datasource Management
  • Setting Up an API Ingest Datasource

Setting Up an API Ingest Datasource

2 min read

Datasources are the heart of Twinnoverse, acting as the dedicated channels that stream your external data into the platform. This guide will walk you through creating a new “API Ingest” datasource, which allows you to push data directly to a secure endpoint.

Table Of Contents
  • Step 1: Navigate to the Datasources Tab
  • Step 2: Create the New Datasource
  • Step 3: Understanding the Datasource Card
  • What Happens Next?

Step 1: Navigate to the Datasources Tab #

From the main Twinnoverse Dashboard, select the “Datasources” tab from the primary navigation menu. This will take you to the datasource management screen, where you can view existing datasources and create new ones.


Step 2: Create the New Datasource #

  1. Click the “Create New Datasource” button. This will open the creation panel.
  2. In the “Name” input field, enter a clear and descriptive name for your data stream (e.g., “Factory Floor Sensors,” “Server Room Metrics”).
  3. Click the “Confirm” button.

The system will create the new datasource and automatically generate the necessary credentials. The creation panel will close, and you will see your new datasource card appear in the list.


Step 3: Understanding the Datasource Card #

Your new datasource card contains all the essential information you need to start sending data.

Twinnoverse Datasource interface, display a datasource card on it
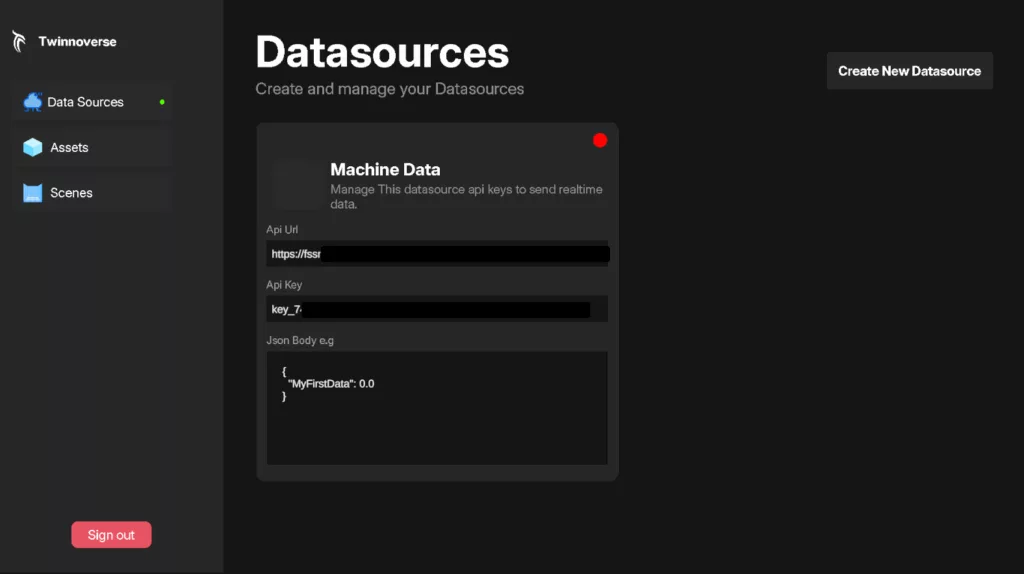
  1. Datasource Name: The name you provided.
  2. API Key: A unique, secret key used to authorize your data submission. Treat this like a password.
  3. Ingestion URL: The specific URL endpoint where you will send your data. This is a constant URL for all API Ingest datasources.
  4. Example Schema: This is a powerful feature that shows you the exact JSON structure the system expects, based on the widgets you have linked to this datasource.

What Happens Next? #

Your datasource is now live and ready to accept data.

  • To send data, you will make a POST request to the Ingestion URL with your data payload, including the API Key in the request header for authentication. For a detailed guide on this, see Developer & API > Ingest API Reference.
  • To visualize the data, you need to link this datasource to a widget. Go to the Asset Editor, add a widget to one of your 3D assets, and select your newly created datasource from the configuration dropdown.
Updated on January 19, 2026

What are your Feelings

  • Happy
  • Normal
  • Sad

Share This Article :

  • Facebook
  • X
  • LinkedIn
  • Pinterest
Datasource Types ExplainedUnderstanding API Keys & Security

Powered by BetterDocs

Leave a Reply Cancel reply

Your email address will not be published. Required fields are marked *

Table of Contents
  • Step 1: Navigate to the Datasources Tab
  • Step 2: Create the New Datasource
  • Step 3: Understanding the Datasource Card
  • What Happens Next?

Menu

  • Documentation
Email

Copyright © 2026 Twinnoverse